
March 13, 2019: Birds were chattering loudly early in the morning even though the thermometer read 20 degrees F. and snow blanketed the ground. I hadn’t heard so much twittering since early last Fall.
The process of starting seeds in used milk jugs continues. Everything takes more time than one anticipates, but it is worth the effort. First step is to assemble all the ingredients: peat moss, perlite, and compost.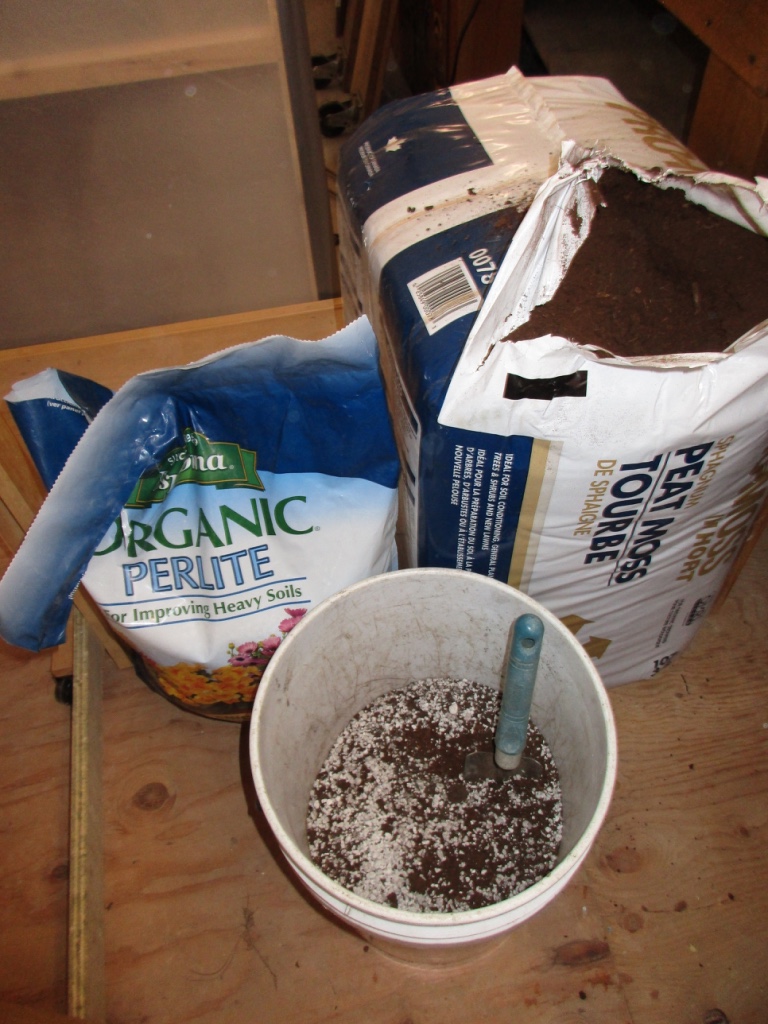 I mix about 1/4 compost, 1/4 perlite, and 1/2 peat in a five gallon bucket I use for the potting mixture. Have on hand strong weather proof tape (duck tape) to seal the two halves, a permanent marker, and clear tape to cover written name. Make sure to put 4 drainage holes on the bottom of jug before filling with potting mixture.
After filling jugs, I slowly add water and mix thoroughly so the moisture is evenly distributed. I use my dandelion pulling tool for mixing.
I plant a variety of seeds, both vegetable and flower, some on the surface, some 1/2″ deep.
After you have sealed the two halves together, identified the seeds planted, you take them all outside in the cold and sunshine. 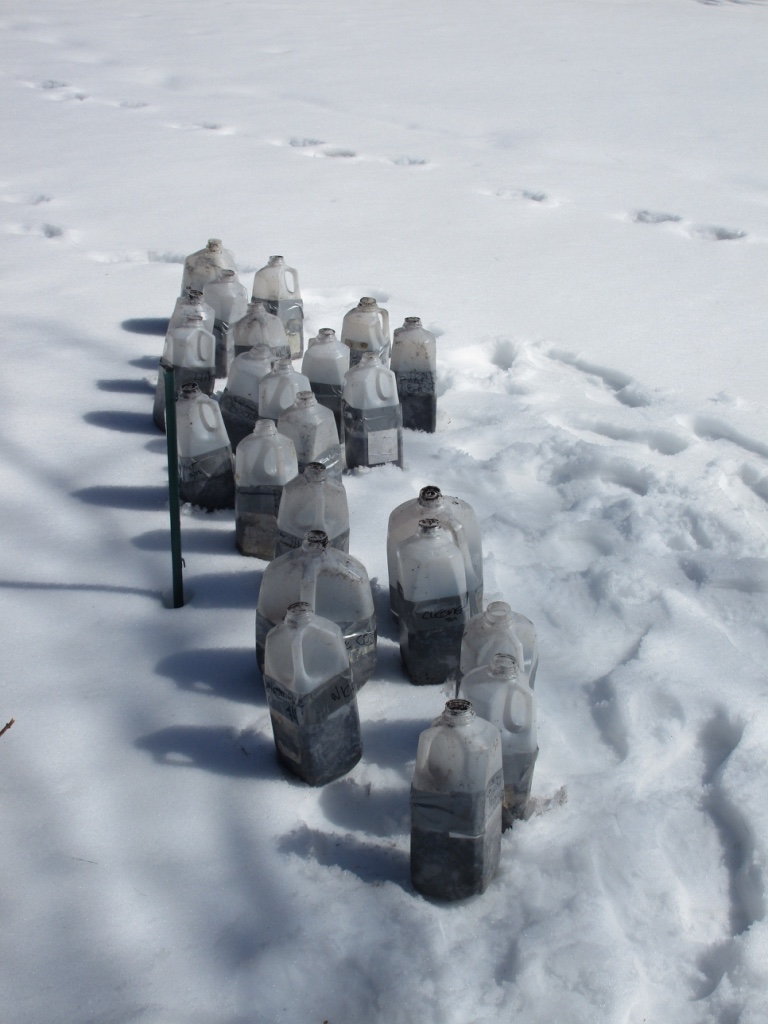
I’ve planted forty-five jugs so far and I hope to plant more. The jugs will sit till late spring planting time, when the seeds have sprouted, which they will do when they are good and ready. They will grow be the strongest plants in the garden. The only tending to do till planting is to make sure they don’t dry out. You have to add water if there has been a long dry spell, otherwise, let them be.